I’ve been looking for a while for a solid solution to easily connect Gravity Forms to Salesforce. There have been lots of them in the past, but makers of Salesforce addons seem to enjoy making them premium over time, and Salesforce has also changed its API a couple of times in the past, breaking some of the free ones.
CRM Perks makes a premium plugin that’s pretty good, but I ran into a use case it didn’t account for the other day: dynamically adding a Salesforce Campaign ID on a per-page basis. So I needed to find something new.
I turned to Gravity Forms’ awesome Webhooks addon (please note that you do need a Gravity Forms Elite license to use this, but that’s pretty typical for full-time WordPress people to have, and I’ve had one for years).
The Webhooks addon essentially is able to do GET or POST requests with your form data, and it allows you to customize those requests with data from the form.
Set up your form
First, get your form set up. For our purposes here, we’re going to set up a basic form with first name, last name, email, and company name:
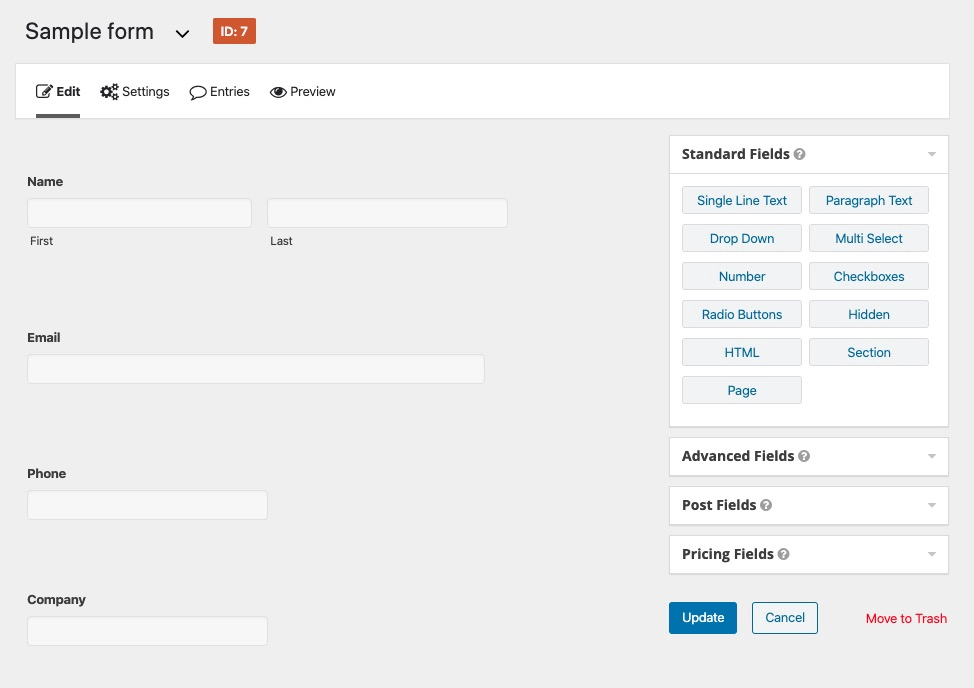
That’s actually all we need to do there for now.
Generate a Salesforce Web-to-Lead form
Log into your Salesforce account, click into Setup (a little gear near the top right), then type “Web-to-Lead” in the search form. You have to have the dashes, and you have to be in Setup, because Salesforce nothing is ever intuitive.
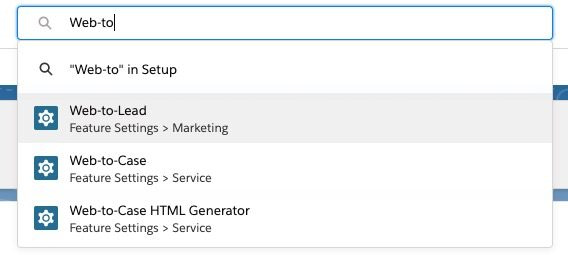
One you’re there, go ahead and generate the web-to-lead form. It should look something like this:
Integrate Gravity forms with Salesforce
In the Gravity form you created, to go Settings > Webhooks, and create a new feed. It should look something like this:

We’re going to be using a POST request, and we want it formatted as a form, so do that. We also want control over the request body, to toggle “all fields” to be “select fields” instead.
Here’s how to configure it:
- The Request URL is the form action from your web-to-lead form (stop copying when you see the ? sign). For this form, it’s https://webto.salesforce.com/servlet/servlet.WebToLead
- Request Method is POST
- Request Format is FORM
- The field values should each be copied over from the Salesforce web-to-lead form.
- Make sure to grab the oid, as that refers to the organization ID, and without it nothing will come into your account (don’t use the one shown here, as that’s my organization ID for my Salesforce account).
Here’s the completed feed:

Test a submission
Go embed the form on a page and test it. To see whether your data is flowing into Salesforce correctly, you’ll want to click into Leads in Salesforce, then look for the most recent leads that have come in.
That’s it!
It’s really pretty simple, but I wasn’t able to find any sort of guide to setting this up in a couple of searches, so I thought I’d write it up.
Thanks Jon, its helpful. In my web to lead form, I also have these items –
Country of Interest:–None–Australia
New Zealand
Subscribe to Mailing List:
How to eneter these in webhooks feed?
Thanks.
input id=”lead_source” name=”lead_source” type=”hidden” value=”Web” /
input id=”00N2v00000Sxl0t” name=”00N2v00000Sxl0t” type=”hidden” value=”1″ /
input id=”00N2v00000Sxl0u” name=”00N2v00000Sxl0u” type=”hidden” value=”Join The Club” /
input id=”00N2v00000UK6vZ” name=”00N2v00000UK6vZ” type=”hidden” value=”1″ /
input type=”hidden” name=”Campaign_ID” value=”7012v000002BkPj” /
input type=”hidden” name=”member_status” value=”Added” /
Country of Interest:select id=”00N2v00000Sxl0v” name=”00N2v00000Sxl0v” title=”Country of Interest”option value=””–None–/optionoption value=”Australia”Australia/option
option value=”New Zealand”New Zealand/option
/selectbr
So, it should actually work in pretty much the same way as the other fields. What you’ll do is 1) figure out the names of these fields **as they appear in salesforce** 2) in the view like the screenshot above, you’ll enter the salesforce names of the fields in the columns on the left, then 3) match them up with the Gravity Forms values in the column on the right.